Two kinds of snapping help you place things exactly. The grid keeps moves, lifts and resizes to whole steps. Lining up snaps an object level with, flush against or centred on the objects around it, with a guide to show what it lined up with.
The grid
The Snap menu in the status line, at the bottom of the window, shows the steps, such as "Snap 1 mm · 15°":
- Grid: the step for moving, lifting and resizing: 0.1, 0.5, 1, 2, 5 or 10 mm (inch fractions in a design in inches), or Off. 1 mm to start with.
- Rotation: the step for turning: 1°, 5°, 15°, 22.5°, 45° or 90°. 15° to start with.
They're saved with the design, and changing them is an undo step. Sketches snap their points to the same grid.
While you place a shape on a box's face, the grid counts from that face's edges instead, so the shape lands whole steps from the nearer edge each way, with its distance to each edge showing. See placing shapes.
Lining up
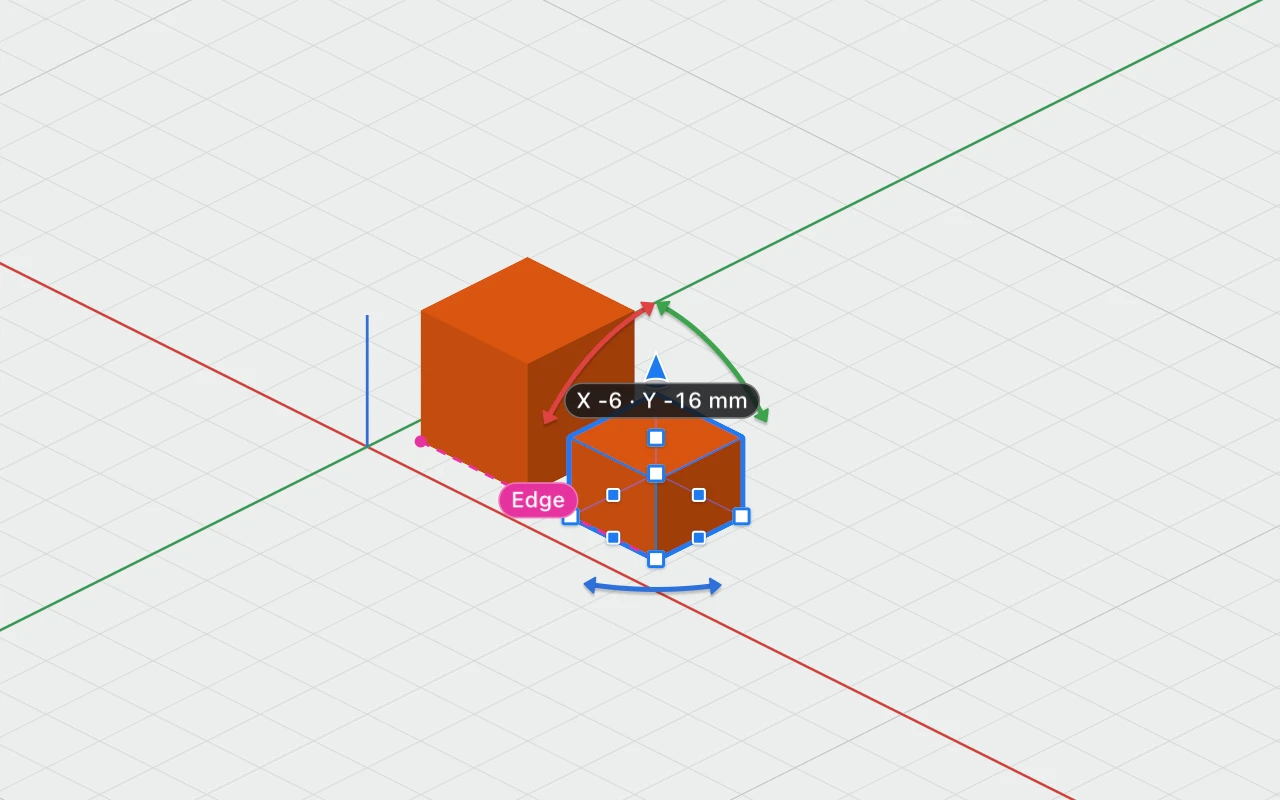
While you move, lift or resize something, it snaps to the objects around it when it comes near:
- Flush: one side against another object's opposite side, or sitting on top of it.
- Edge: a side level with another object's same side, or touching corner to corner.
- Centre: its middle level with another's middle.
A dashed line shows each one it found, labelled Flush, Edge or Centre. It works with each object's box, along the workplane's directions, and works even with the grid off. Where nothing lines up, the grid snaps as usual.
Moving freely
Hold ⌘ while dragging to turn all snapping off, the grid and lining up both, for that drag.