Choose a shape from Create and it follows the pointer, so you can put it exactly where it's wanted: on the build plate, or on any face of what's already there.
Placing a shape
- Choose a shape from Create ▾ in the toolbar, or the Create menu in the menu bar: a Box, Cylinder, Sphere or Cone, a Box Hole or Cylinder Hole, or a part.
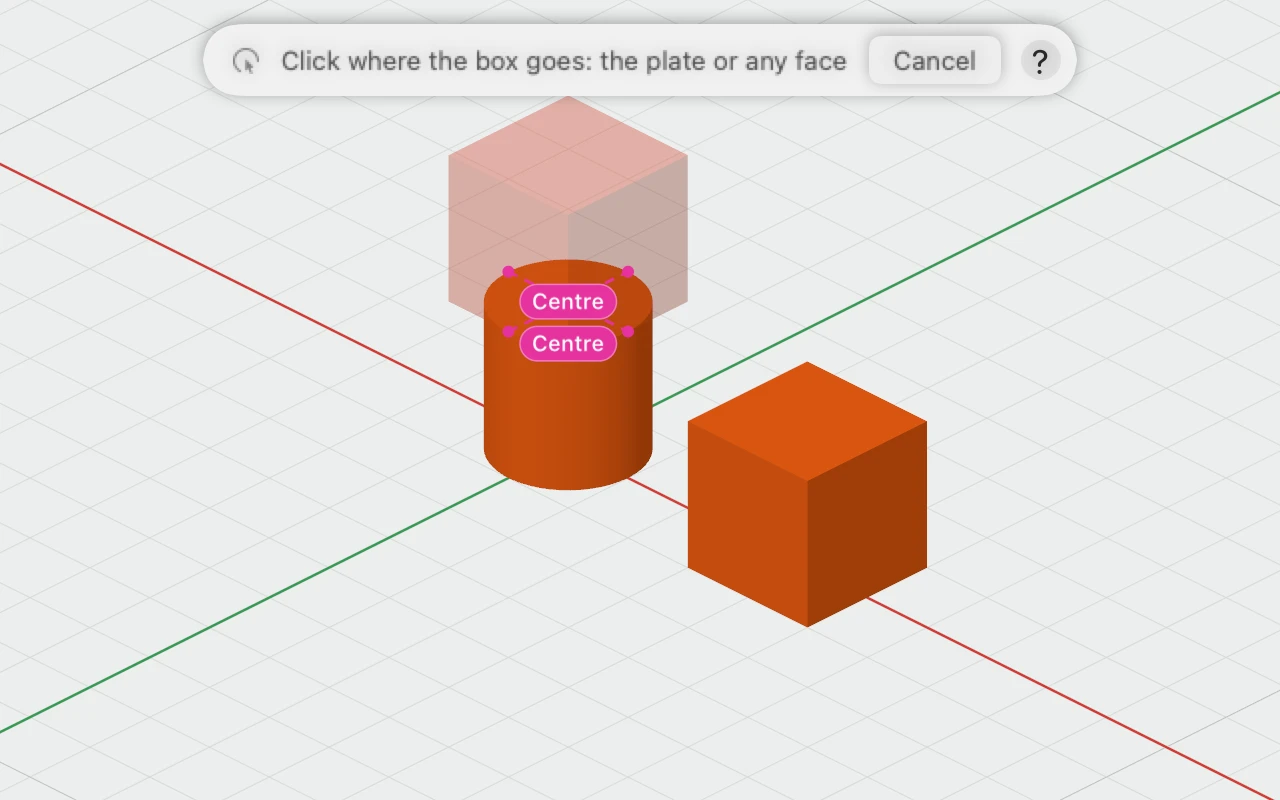
- Move the pointer over the view. A see-through copy shows where the shape would land: on the face under the pointer, standing out of it, or else on the build plate. The bar at the top says what's being placed.
- Click to put it down. It's added and selected, ready to resize or move.
Choosing a shape ends whatever other tool was on. One ⌘Z takes the shape away again.
Lining up
You rarely need to type a position:
- Over a face, the shape lines up with the object below it, centred on it or with its edges, and pink guides say how.
- Next to other objects on the plate, it lines up with their edges and middles in the same way.
- Anywhere else, it snaps to the grid, which on a box's face counts from the face's edges (below).
- Hold ⌘ to put it exactly where you click, lined up with nothing.
Distances to the edges
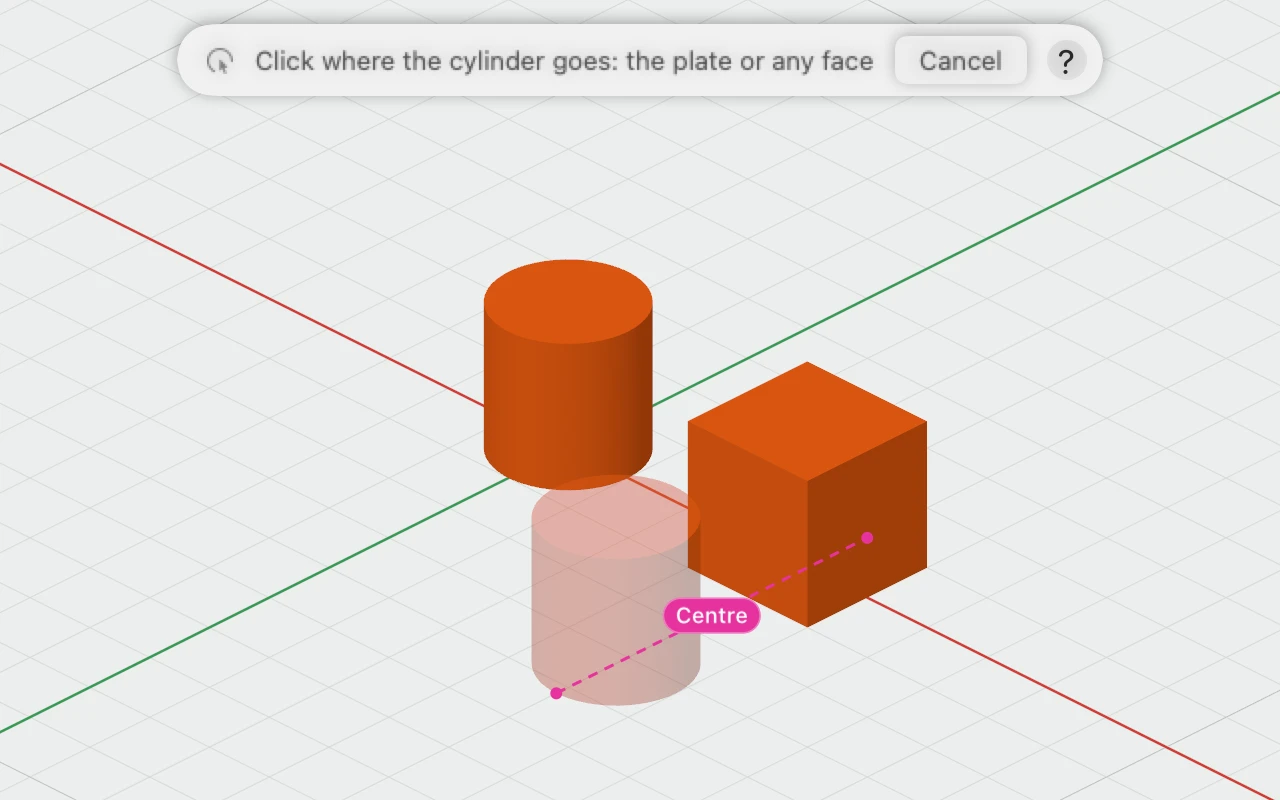
Over a box's face, or the flat end of a cylinder, cone or thread, teal lines show how far the shape is from the face's edges, so you can put it exactly where it's wanted:
- On a box's face: the distance to each of its four sides, square to the side.
- On a round end: the distance to the rim on either side, along the line through the two middles.
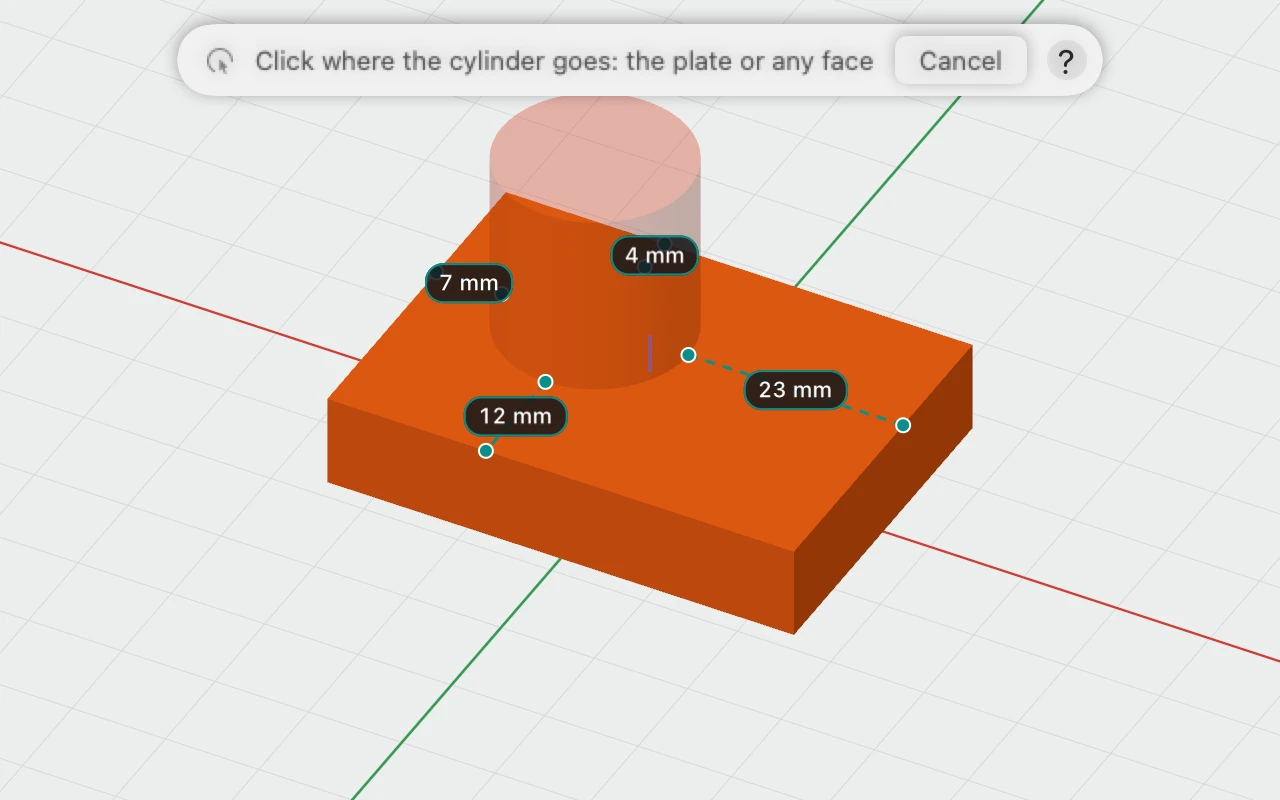
On a box's face the grid counts from the face's edges, so with 1 mm snapping the shape lands a whole number of millimetres from the nearer edge each way, even if the edges aren't on the grid. A shape hanging over an edge shows a negative distance, and a distance of 0 isn't shown. The distances show with ⌘ held too, and go as soon as the shape is put down.
Holes and parts
Holes are placed the same way, drawn striped so you can see what they'll cut. A countersunk or counterbored hole placed on a face sinks into it, so its top sits flush with the face, ready for a screw.
On a workplane
Right-click a face and choose Set Workplane Here, and the grid moves onto that face: shapes placed anywhere off another object land on the workplane instead of the plate, standing square to it. View › Reset Workplane puts the grid back.