With one object selected, handles appear on it. Drag them to raise, resize and turn it, or drag the object itself to slide it across the plate. Drags snap to the grid as you go.
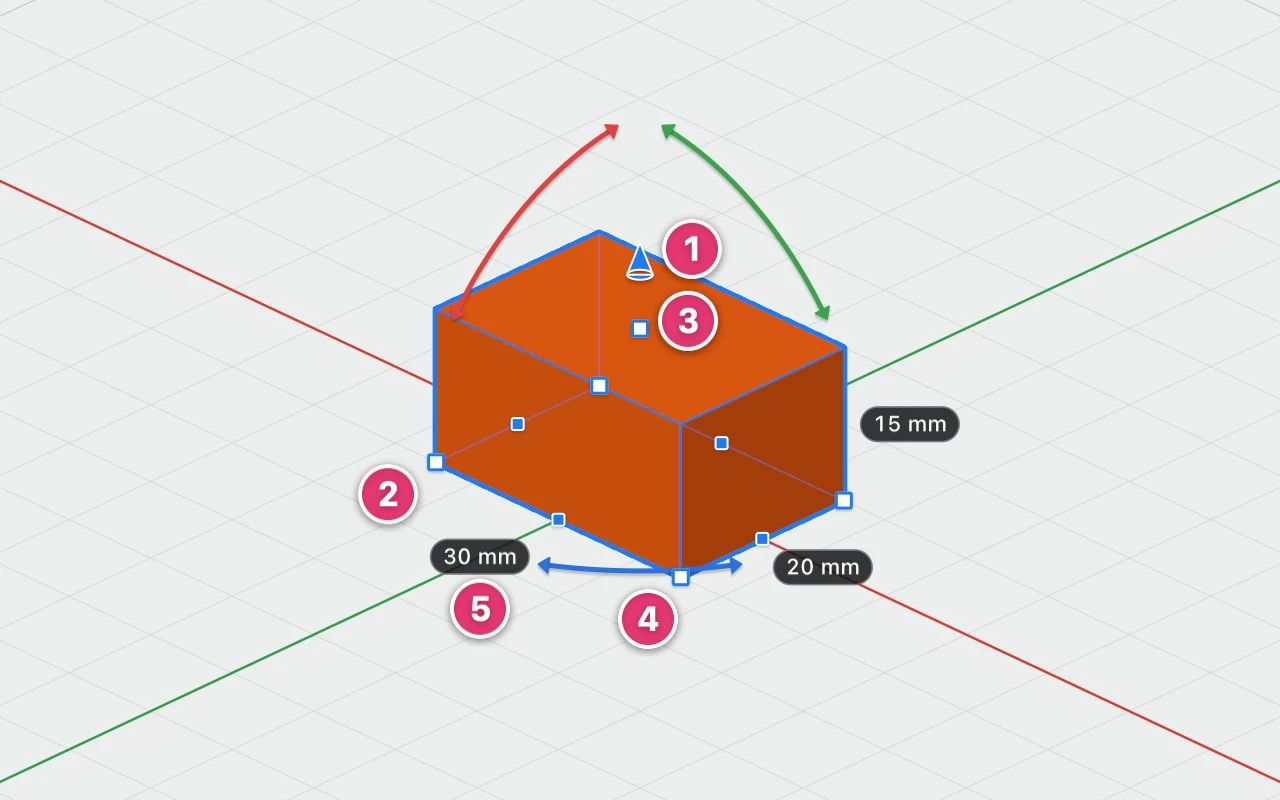
- The lift cone raises the object, or lowers it.
- The squares round its bottom resize it, keeping the opposite side where it is: a corner square two ways at once, a side square one way. Hold ⇧ to keep its proportions, or ⌥ to resize from its middle.
- The square on top sets its height, keeping its bottom where it is.
- The arcs turn it: the red arc about X, the green about Y and the blue about Z, a step at a time.
- A size label shows a size as you work. Click one to type an exact size, in any unit.
Sliding it
Drag the object itself to slide it across the build plate, or across the workplane if one is set. With several objects selected, only the lift cone shows, and dragging any one of them moves them all.
The arrow keys move the selection one grid step at a time, ten with ⇧, in whichever direction looks like that way on screen. ⌘↑ and ⌘↓ lift and lower it.
While dragging
- Hold ⌘ to turn snapping off and move freely.
- ⇧, ⌥ and ⌘ work the moment you press them, without moving the pointer.
- Press Esc to put everything back as it was.
- A whole drag is one step, so one ⌘Z undoes it.
How far a drag snaps, and the angle turns snap to, are in the status line's Snap menu. For exact numbers, use the inspector: see The Caliper3D Window.